Tips For Successful Drywall Seam Repair

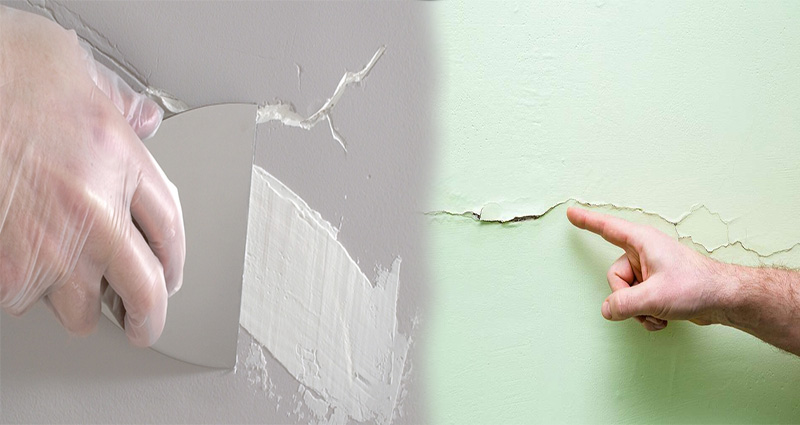
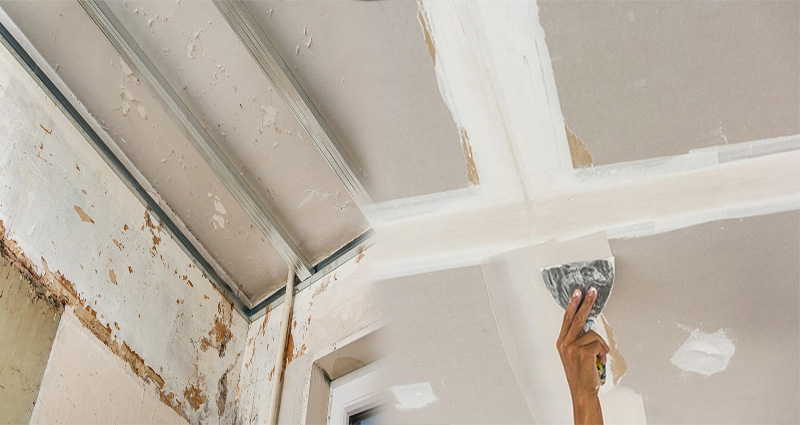
Drywall seam repairs are fairly common and are usually very simple if you know what materials to work with. If you find yourself in need of drywall seam repair, you’re not aloneā€”it happens all the time! Drywalls are located in many places throughout homes and buildings, including ceilings, walls and even floors. And while they might seem like they’re always perfectly smooth and solid, this is not always the case. In fact, drywall seams can often crack or become damaged over time due to normal wear-and-tear or even from damage caused by other building materials such as pipes or electrical wires that aren’t properly installed or maintained by contractors who don’t take proper precautions when working on projects within them.

If you find yourself in need of drywall seam repair, you’re not alone.

Drywall is a common building material that can be used for many different things. From walls to ceilings, drywall serves as a sound barrier and helps keep your home energy efficient. With proper care and maintenance, your drywall will last you years!

But what happens when something goes wrong? If you find yourself in need of drywall seam repair, you’re not alone: it happens more often than you might think! Fortunately for those who have experienced this problem before (or those who want to avoid it altogether), we’ve put together some tips on how best go about fixing them yourself with minimal hassle or cost.

Don’t panic! Drywall seam repair is a common problem that can be

READ MORE >>>
How To Fix A Small Drywall Crack

If you’ve got a small crack in your drywall, it may seem like a disaster. But as long as the crack is less than an inch wide (and especially if it’s less than 1/2 inch), you can repair it yourself. Here’s how:

Step 1

  • Prepare the area: Remove all loose drywall, clean it and then apply joint tape to the back of your patch.
  • Apply joint compound: Use a putty knife or taping knife to apply a layer of drywall compound over both sides of the crack. Let this dry completely before sanding it smooth.

Step 2

The next step is to use an awl or screwdriver to make a small hole in the drywall. This will allow you to apply the drywall compound into the crack and around the anchor. A putty knife can then be used to remove any excess compound from around your repair area, giving it a clean look when finished.

Next, use an electric drill with a 3/16″ drill bit attached (or smaller) and press it against one side of your old drywall anchor until it breaks free from its holding power in your wall surface’s masonry layer (usually concrete).

Step 3

  • Apply a small amount of joint compound to the crack.
  • Let it dry completely, then sand it smooth with a fine-grit sandpaper. Repeat for additional cracks if necessary.

Step 4

Step 4: Sand the area with a drywall sander. This will smooth out any rough edges and help to ensure that the patch … READ MORE >>>

Hollow-Wall Hole Repair

Wall holes can be repaired quickly and easily if you know what to do. You just need a few basic tools, some drywall patching compound and paint, and a little bit of patience. Here are the steps:

Step 1: Remove the damaged drywall.

To begin, remove the damaged drywall. Use a drywall saw to cut out the damaged drywall and then tap out any nails with a hammer. Vacuum up any debris that remains on top of your subflooring before moving on to Step 2.

Step 2: Clean up the area to be patched with a vacuum and a damp rag.

Clean up the area to be patched with a vacuum and a damp rag.

Use a vacuum to clean up dust and debris. Then, use a moist cloth or paper towel to wipe away any excess dirt or grime that’s on the wall around the hole. This will help ensure your patch blends in seamlessly with your walls when you’re done painting it.

Step 3: Cut a piece of drywall to fit snugly into the hole.

  • Measure the size of the hole. Use a tape measure to determine the length and width of your repair area, then subtract 1/2 inch from each measurement. This will leave enough room for drywall compound when you’re finished patching up your wall.
  • Cut your piece of drywall with a utility knife or drywall saw in order to create an opening that’s slightly smaller than what you measured earlier (so it fits snugly into
READ MORE >>>
Fix Drywall with This DIY Guide

Drywall patching is a quick and easy job you can do yourself. Whether it’s an accidental hole in the wall or a more serious problem with water damage, patching drywall is a simple DIY project that will help you restore your home to its former glory. There are several different ways to repair drywall; depending on the size, location and type of damage we can use all types of materials including joint compound (mud), spackle and tape with paper backing. This article will go through each step in detail so that you know exactly how to repair drywall like a pro!

Drywall patches are easy to make if you have the right tools, materials and know-how.

To make a successful drywall patch, you’ll need:

  • Drywall compound (aka joint compound). This is the material that fills the space between layers of drywall. You can get it at any hardware store or home improvement store.
  • A taping knife, which is a long flat tool with a handle at one end and a curved blade on the other end. It’s used to spread out the joint compound as evenly as possible over large areas without making too many mistakes!
  • Sandpaper in various grits (coarse, medium and fine) so you can smooth out any rough spots after your first coat dries up completely before applying another layer of joint compound over top those areas where there might still be some bumps left behind by sanding down too much earlier on while trying not miss
READ MORE >>>
How to Minimize the Drywall Repair Cost From Water Damage

The cost of repairing drywall after water damage can be costly. Luckily, there are ways to minimize the impact while still getting a professional result. Before you begin the process, you need to get a free quote from a contractor. A construction contractor will typically charge around $60 per hour, plus materials. Typically, they’ll cut out the damaged drywall and remove any insulation, then install a new panel. They might also charge extra for mold remediation. This process can prevent the spread of mold and is generally priced at $2,300.

Getting a free estimate for drywall repairs

Water damage can cause a variety of drywall issues, ranging from hairline cracks to bulges at corners or seams. You may also notice bubbling or peeling paint, which could indicate a larger problem. Water damage can also shift your home’s structural elements.

Hiring a construction professional to repair drywall

Water damage can be a serious issue for your home, so you may want to hire a construction professional to repair drywall after a leak. Even a small leak from a pipe can lead to a large problem. While the water itself may not be visible, you can tell that there’s a problem if you notice spots that are discoloured or soft to the touch.

Also, if your drywall smells musty, it’s likely that there’s hidden mold buildup that’s causing the damage. A construction professional will have the skills and equipment to determine whether or not there is mould.

Choosing between a handyperson and

READ MORE >>>