Cost-Effective Kitchen Remodeling Ideas for Small Homes
Remodeling a kitchen can be a daunting task, especially if you have a small home and a limited budget. However, with some creativity and strategic planning, you can transform your kitchen into a functional and aesthetically pleasing space without breaking the bank. In this article, we will explore some cost-effective kitchen remodeling ideas specifically tailored for small homes.
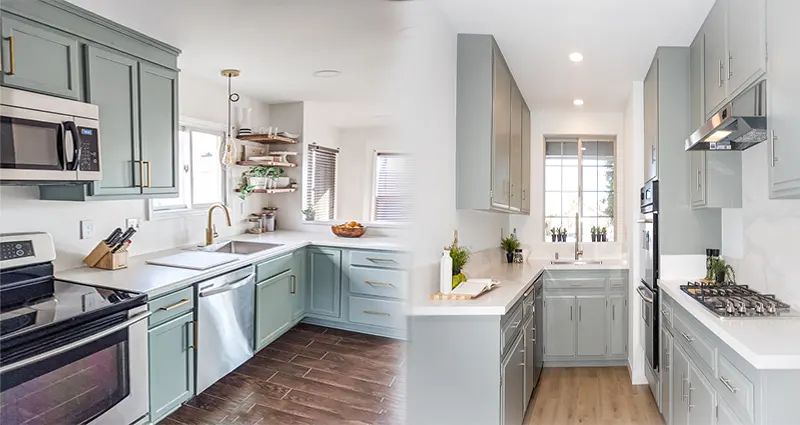
1. Paint and Update Cabinet Hardware
One of the simplest and most budget-friendly ways to give your kitchen a fresh look is by painting your cabinets and updating the hardware. A fresh coat of paint in a light color can make the space feel larger and brighter, while replacing old hardware with modern designs can instantly upgrade the overall appearance of your kitchen.
2. Maximize Vertical Storage
In a small kitchen, every inch of space counts. Utilize vertical storage options such as floating shelves, pegboards, and wall-mounted racks to keep your countertops clutter-free and maximize storage capacity without taking up valuable floor space.
3. Consider Open Shelving
Open shelving not only creates an illusion of a more spacious kitchen but also provides a practical and stylish way to display your dishes, cookware, and decorative items. Swap out upper cabinets for open shelves to achieve a more open and airy feel in your small kitchen.
4. Upgrade Lighting Fixtures
Good lighting can significantly impact the ambiance and functionality of your kitchen. Consider replacing outdated light fixtures with energy-efficient LED lights, pendant lights, or under-cabinet lighting to brighten up your space and highlight key … READ MORE >>>
